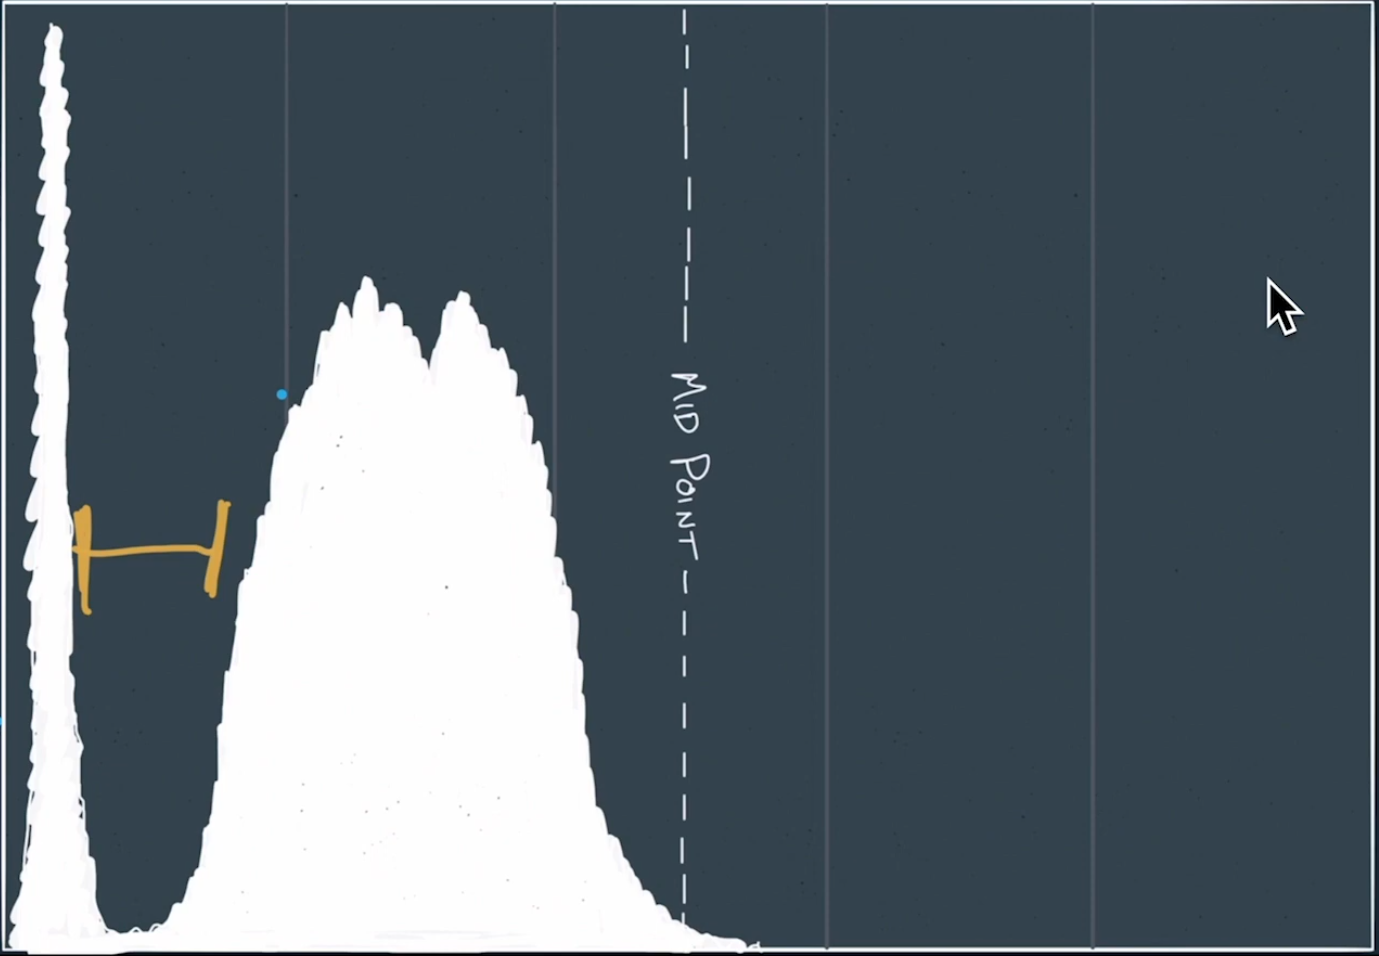
Sony setup as follows. Base the ISO on this histogram:

Be sure the gap is there, as indicated by the yellow lines above.
ISO 8000 is probably the perfect place at 8 seconds depending on the lens and shutter choice. Experiment.
Here’s some more information on getting great Milky Way photos.
- Get to the location early before it’s dark. Scout the area, figure out where you want to shoot from.
- Know which direction the Milky Way will be in the sky.
- Try Blue Hour blending. Capture the scene during Blue Hour. Settings: F4 , 8 seconds, ISO 400 for a start. A touch of grain isn’t going to hurt. This image will be blended in Photo Shop.
- 14mm lens, ISO 6400, f2.8, 20 seconds exposure. Wide open aperture, actually.
- To focus, do it manually. Get the points of stars as sharp and bright and possible, close to infinity. Use brightest star, zoomed in, adjusting the star to as small as possible.
- Check each shot with image review for sharpness.
- If too much trailing, reduce shutter speed and ISO.
- Take multiple images, like 10 shots exactly the same with 2 second timer.
- These 10 images will be stacked.
- Put the lens cover on at shoot 3 dark frames. Stack everything. Photoshop will calculate everything and provide the best look.
- Dark Frames — What are they? See the next post.