Author: Tom
-
Appliance Open House Ideas Home Depot
Planning the Open House for Max Impact Aim for a weekend event (Saturday/Sunday afternoon) when families and homeowners are out shopping. Keep it 2–4 hours to avoid burnout. Core Elements to Pitch/Prepare: Lead-Gen Focus During the Event: Other Ways to Amp Leads in the Meantime (While Remodel’s Ongoing) Even during construction, use the “coming soon”…
-

Removing Stock Air Box from Durango Hellcat
There are only 5 steps involved. That’s all there is to it. Simple and fast. Below is information about the MSU and IAT.
-
Dark Frames and Stacking
The random noise of the dark frame is calculated and removed by the computer sensors. Sensors heat up when taking long exposures, creating hot pixels. It’s called thermal noise. Stacking software thinks the pixel is part of the photo. So take dark frames. They are images of the hot noise. The computer will use them…
-
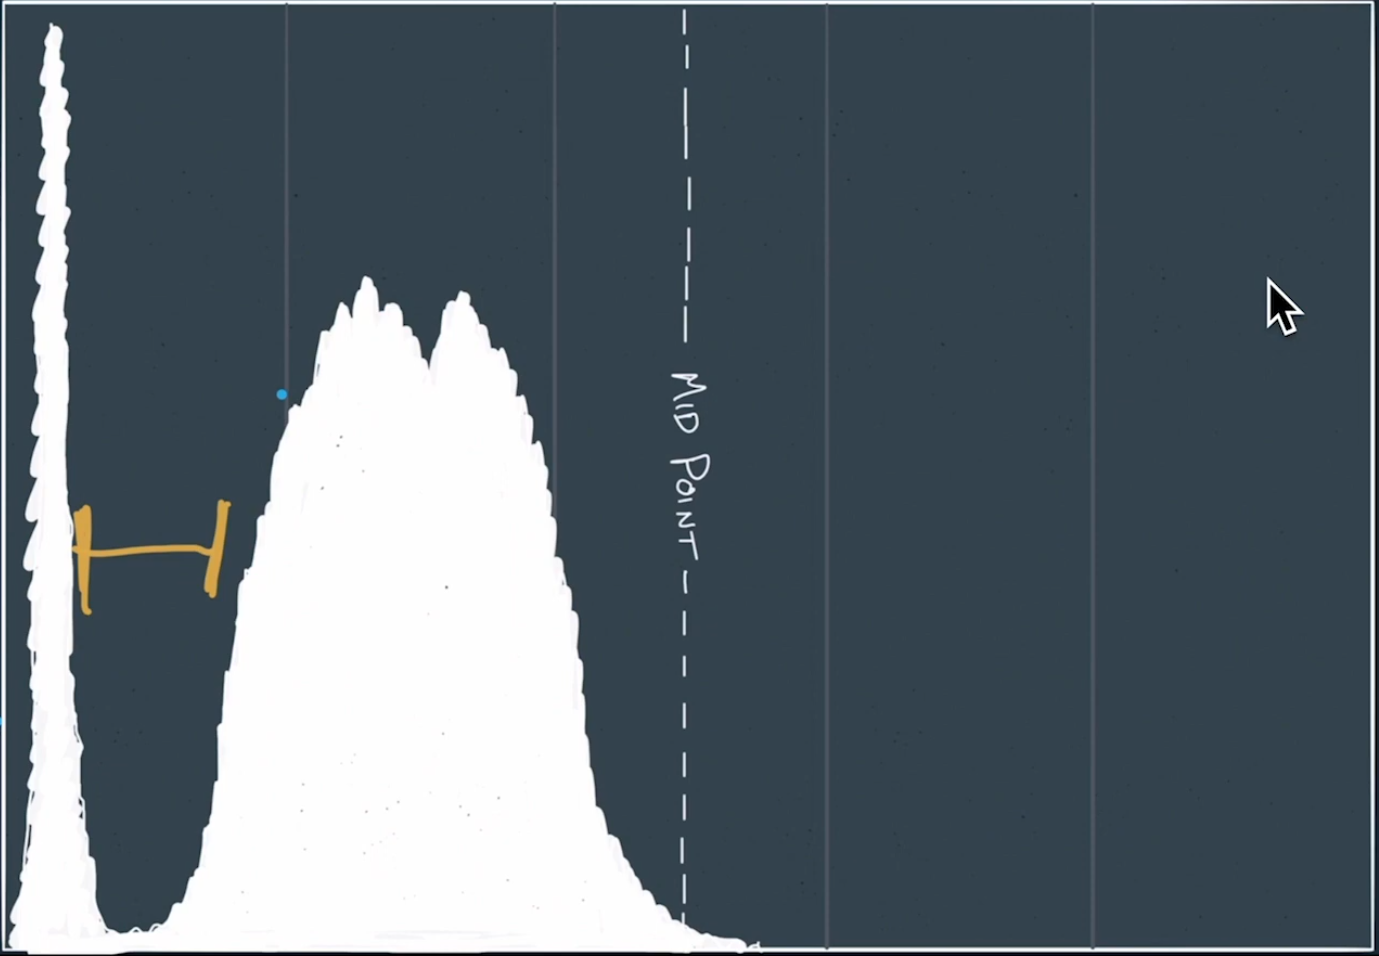
Milky Way Settings
Sony setup as follows. Base the ISO on this histogram: Be sure the gap is there, as indicated by the yellow lines above. ISO 8000 is probably the perfect place at 8 seconds depending on the lens and shutter choice. Experiment. Here’s some more information on getting great Milky Way photos.
-
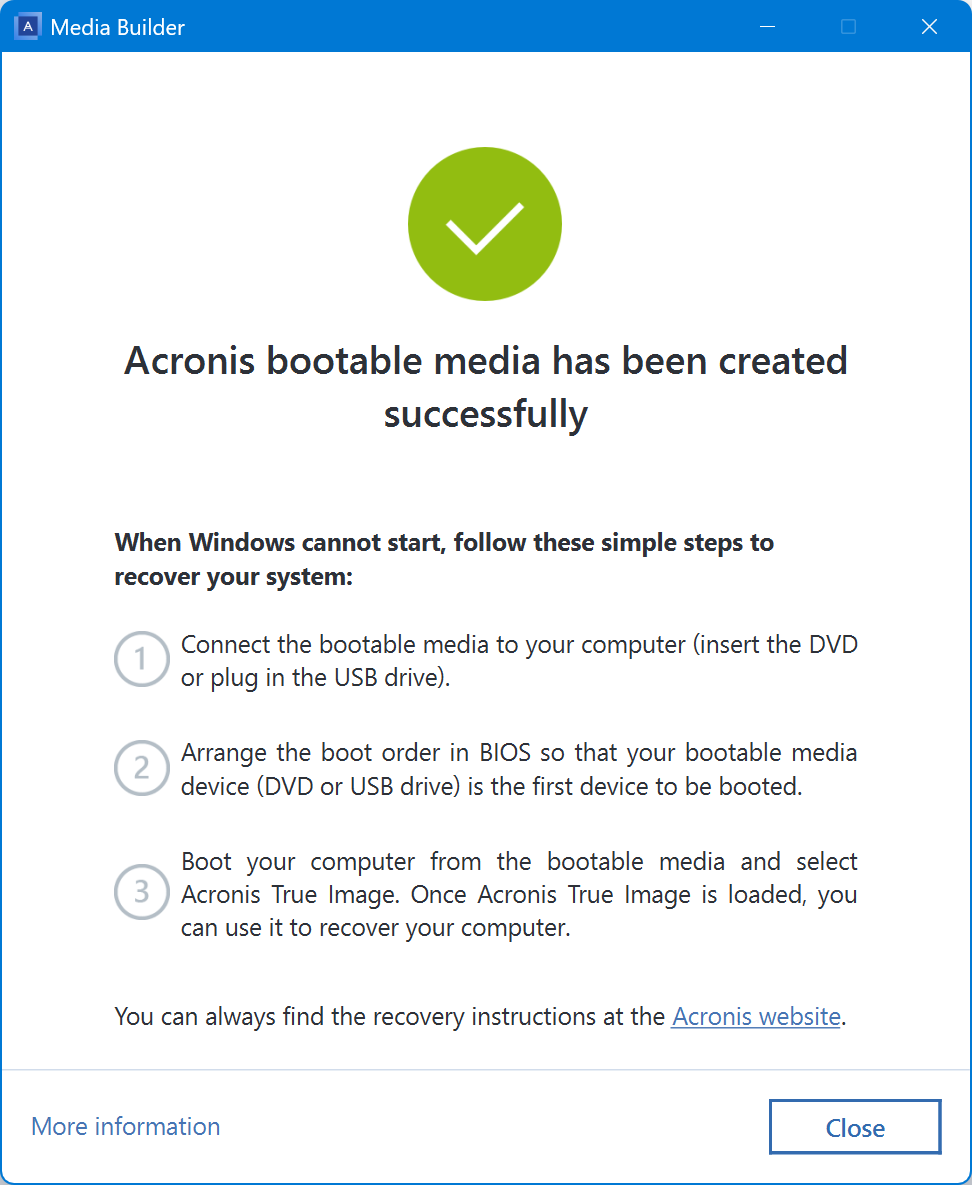
Acronis Bootable Media What To Do When Windows Won’t Start
When Windows cannot start, boot from the SDD in the NexStar3.1 housing.
-
Hellcat Catch Can
11 December 2025 — This is from Grok’s info on why Dodge didn’t install a catch can on their cars from the factory. “From an engineering standpoint, every supercharged 6.2L Hemi should have left the factory with a catch can — especially the 800–1,000+ hp Redeye/Demon/Jailbreak models that make obscene amounts of blow-by. From a…
-
-
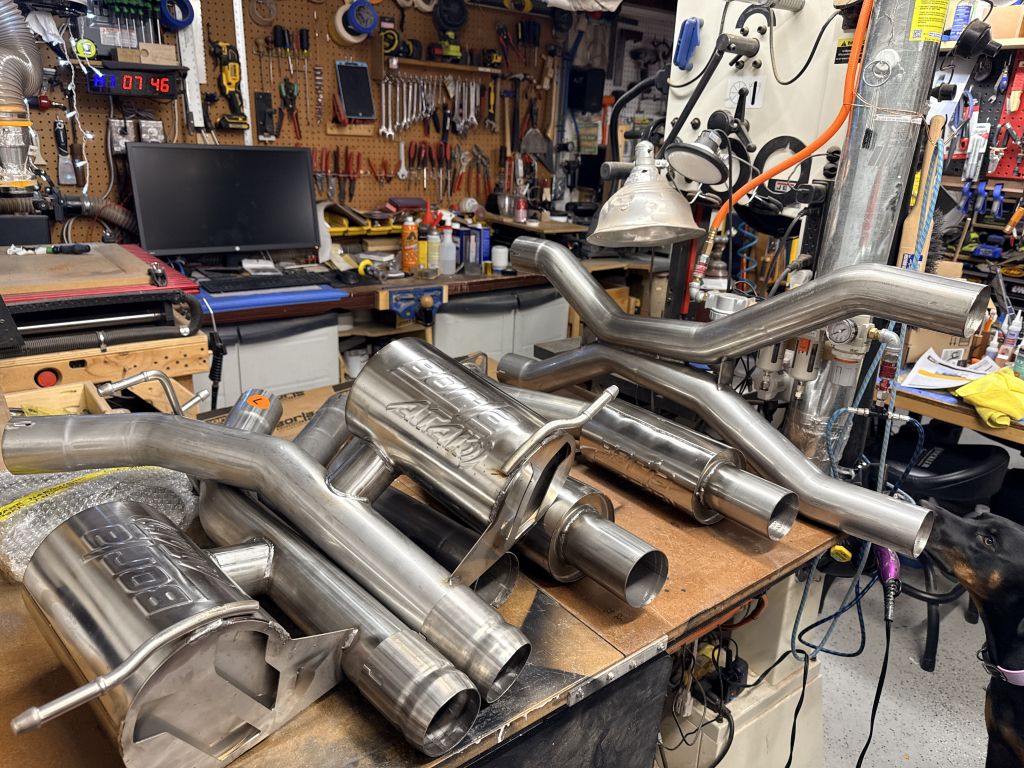
Borla ATAK Durango Hellcat 2024
3 December, 2025 — This stainless steel tubing will be installed on the Durango Thursday. I’m having Brandon at Big B Muffler do the work.
-
Borla ATAK on Durango Hellcat
This is the sound file from Borla. This is the Durango Hellcat with the Borla ATAK installed.
-