9 July, 2025 — Here’s how to get perfect star trails shots no matter where you live. Light pollution or perfect Bortle 2 makes no difference. Light trails are great no matter what.

Follow these bullet points for the best shots.
- A good tripod is a must. No jiggly wiggly allowed if you want good trails.
- Use a focal length that captures more sky. A 14mm is fabulous, but a 50mm would work as well. The longer lens just creates a tighter final image with less room for the stars.
- Shoot in RAW for the most detail and ability to manipulate photos in Lightroom later. Or shoot in high quality JPEG, since most devices such as computer monitors and phone screens can’t resolve the differences anyway. RAW is best if you want to blow up the final image and turn it into a huge acrylic or metal print.
- Use an ISO that’s as low as you can go and still get enough light into your sensor. I have good fortune with ISO as low as 100 using my Sony A7R5. ISO of 400 to 12,800 works. High ISO noise can be removed in Lightroom or through AI-driven noise reduction. If you have a sucky NIKON camera, ha ha. Good luck. (Just kidding. NIKON probably doesn’t suck too bad.)
- Use the widest aperture possible with your lens. I use f/1.8 on my 14mm Sigma for lots of light. Long shutter times compensate for higher ISO settings, as you know from the photography triangle of ISO, aperture, and shutter speed.
- Turn on Interval Shooting. Start Time 3 seconds. Set and interval that is the same or greater than the exposure time for back to back shooting. If you want time to lapse between 10-second shots, you can set an Interval for 15 seconds, and there will be a 5-second lapse between shots, because the Sony calculats the Interval based on how long your shutter speed is. Or at least in my testing I find that to be the case.
- Number of Shots from 120 to 1000. Set AE Tracking Sensitivity to Low. You can use AUTO ISO if you want to, the Sony seems to love dark skies and low light.
- BULB Timer is ON, Exposure Time is 5 to 15 seconds. The longer each exposure is, the more detail you get in the final image.
- Focus must be Manual. Focus on brightest object in the sky, starting with your lens at infinity setting, then using viewfinder, adjust so the star or object is the smallest point of light possible with the sharpest definition. This is true infintiy. If you lens us a Manual Focus Lock, turn it on. You are now set to shoot any part of the sky without thinking about focusing.
- Auto focus just won’t work very well shooting in the dark.
- Shoot during the later part of golden hour as it creeps into civil and nautical twilight for golden skies and gold tinged star trails mixed with deep blue skies and white trails.
- With these parameters set, compose the shot you want, and hit the shutter release button. Since you are in Interval Shooting mode, you can take a nap while your camera works.
Once all the images have been captured, you are ready to develop them and create the final image. If you shot in RAW, you’ll have converted them to JPEG and put them in a folder such as “Star Trails Ready to Stack” or some other name you like.
Here’s how to develop:
After developing the images in Lightroom, or whatever developing software you like, move them to Photoshop for the magic. With Lightroom, you can play with so many attributes, creating a reference image that all other images in the group will adopt after you sync them to the reference photo. It’s not necessary to use Lightroom, but if you shoot in RAW, you’ll need something to convert the images to JPEG. Or just shoot in JPEG, which is what I do to save time. If I were working on a big fancy project with the idea of printing a final image on a large canvas, I’d use RAW initially.
Since this is somewhat experimental, let’s just assume you’ve shot in JPEG and don’t need to do anything with Lightroom, and can go straight to Photoshop.
- Open Photoshop and select File > Scripts > Load Files into Stack.
- Select your star trail images in the pop-up window. Click OK.
- In the Layers window, click the top layer to highlight it. Scroll down to the next to last layer, hold down Shift and click on that layer. All but the bottom layer should be highlighted.
- Change the blend mode from “Normal” to “Lighten.” You star trails will appear.
- Select Layer > Flatten image to merge all the layers.
- Select File > Save to save your star trails image.
NOTE: Depending on the power of your computer, the process of stacking hundreds of images in Photoshop could take some time. There is no visual indicator that images are being stacked until they suddenly appear in the pop-up window. Just wait for it. It’ll happen.
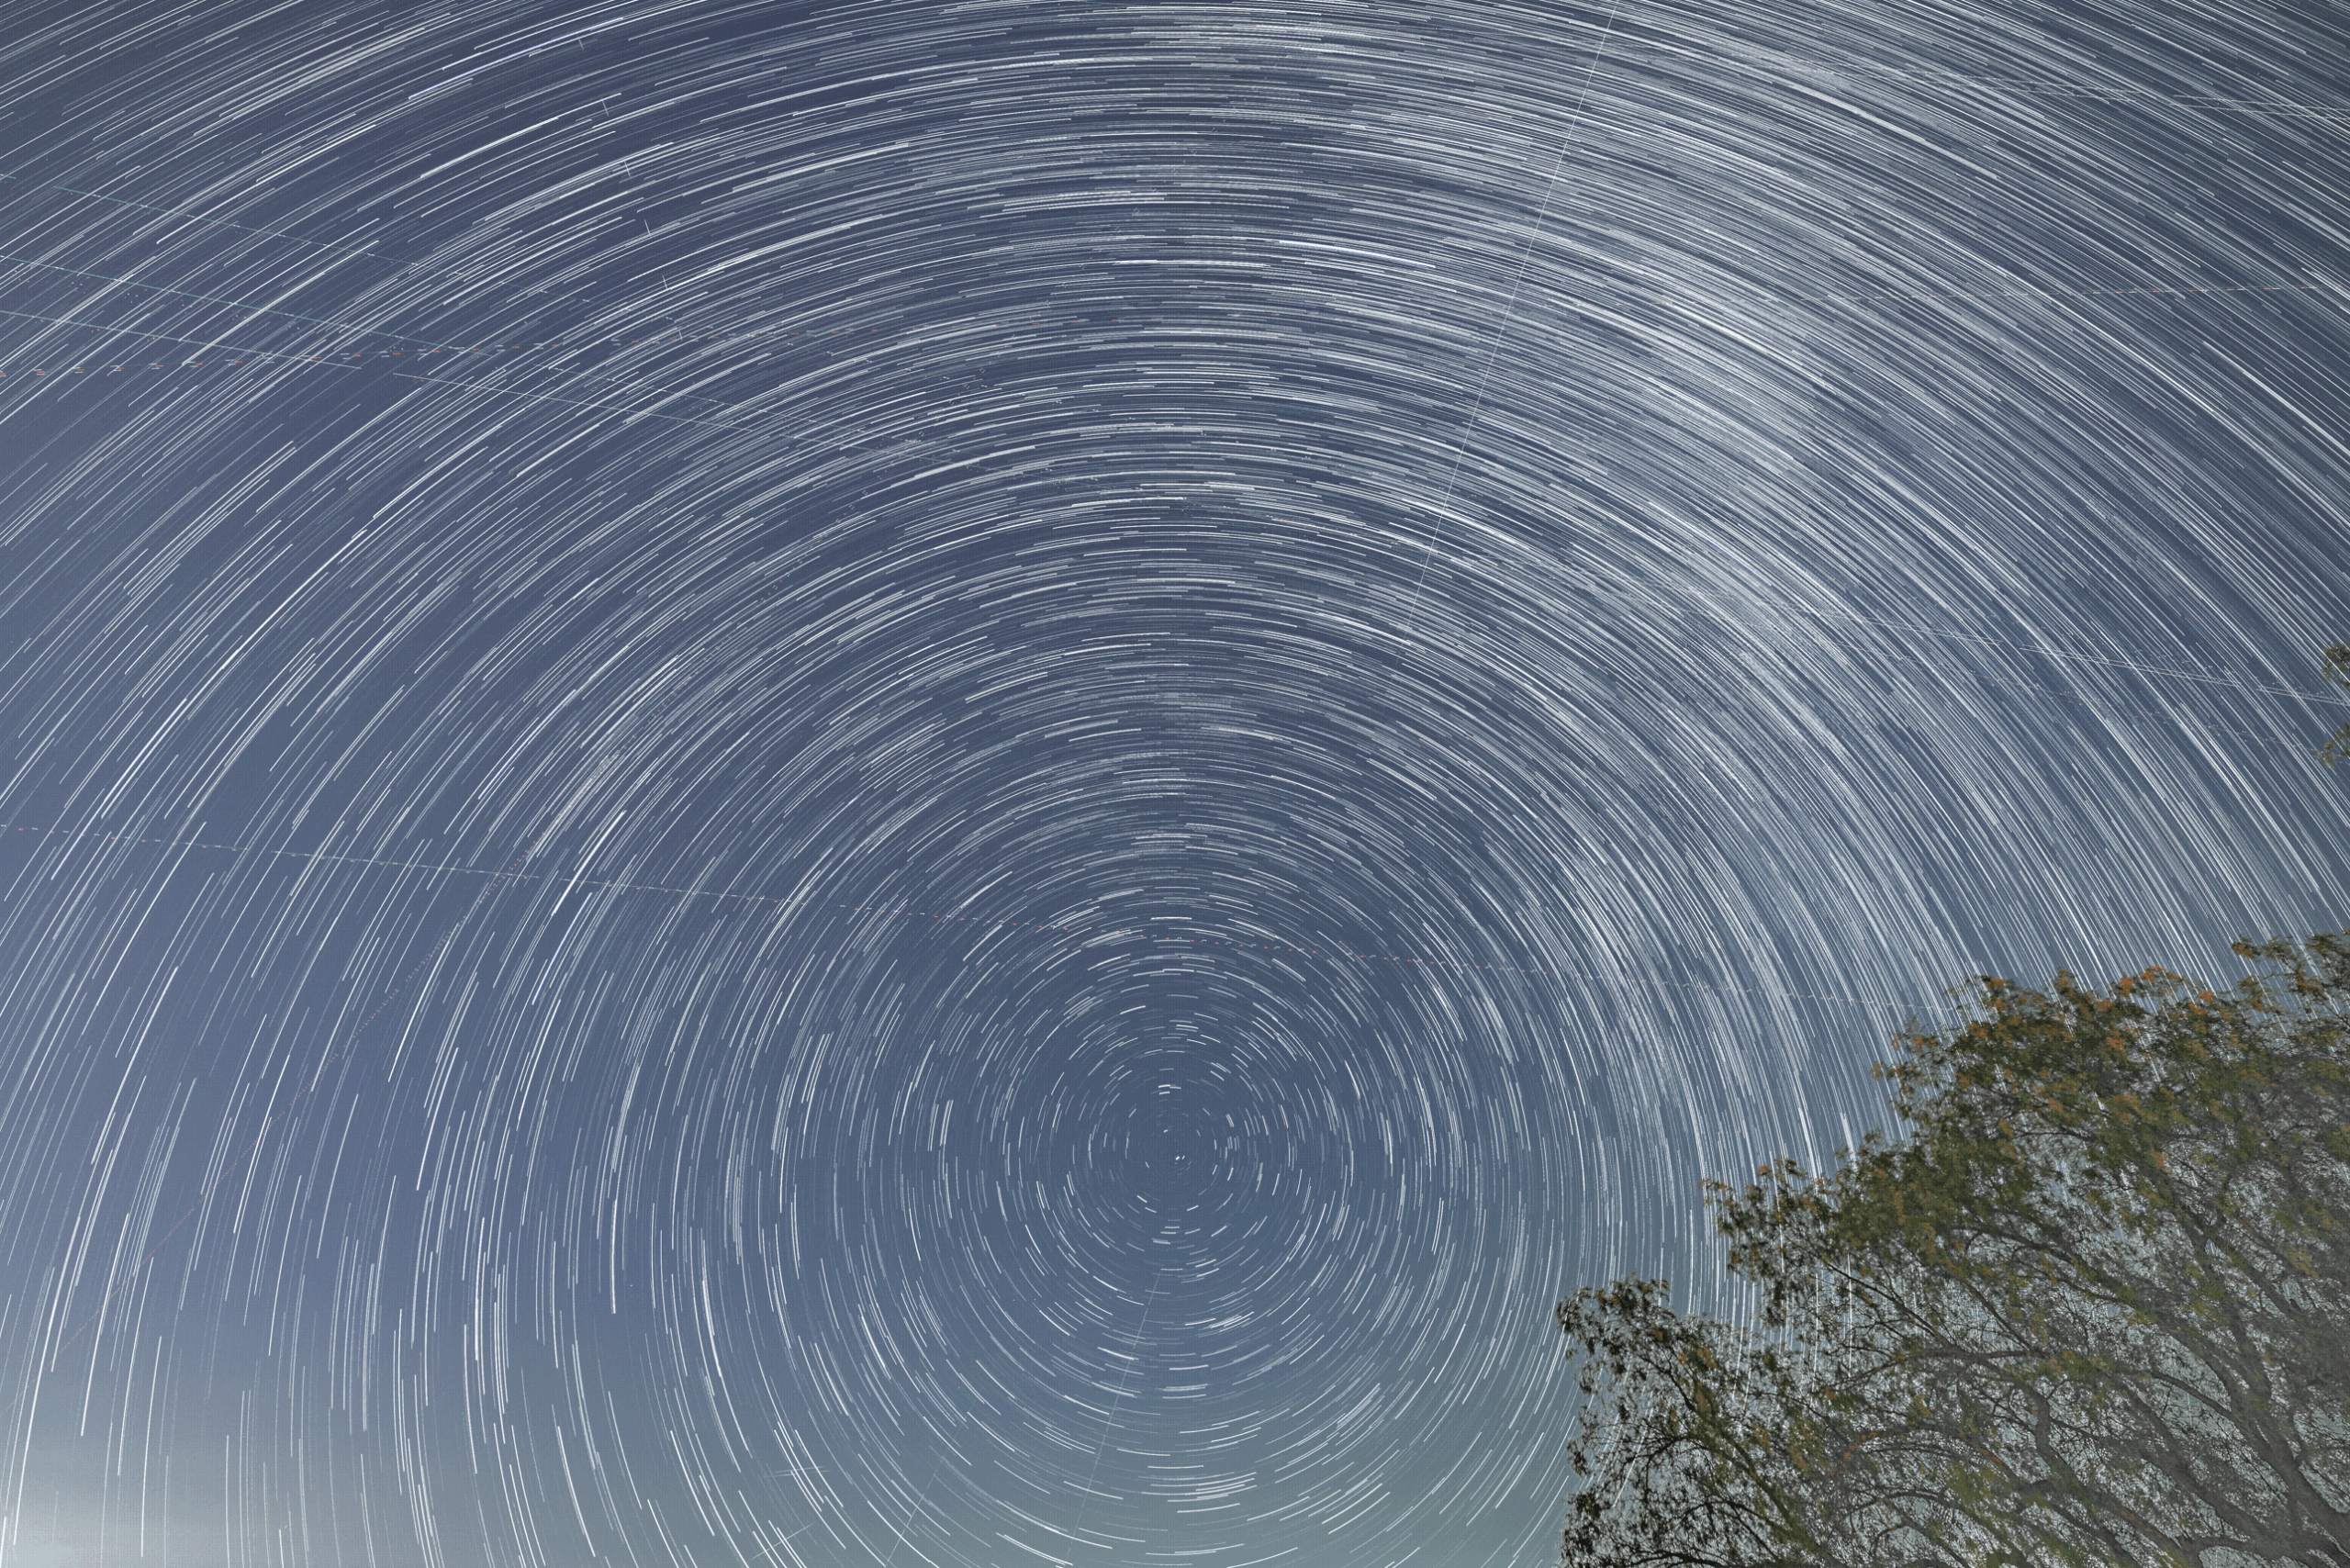
Facing north created circular star trails, while facing south makes arcs. Facing east or west produces slanted star trails. To get a complete circle, you’ll need to focus your lens toward Polaris, true north star, and shoot from that reference point.
That’s it. Practice shooting from your back yard or driveway or rooftop even. You don’t need dark skies for interesting star trails photography, but you will find that the darker the sky, the more dramatic shots you’ll get, and create stuff that grabs attention.
Also, becaue the end game, at least for me, is to do a show at OC Camera with big ass prints… I’ll be working on shooting in the best conditions possible.
For now, my YouTube channel and Instagram account are the only means of delivering photos to the masses. They both work, but there’s nothing quite like a big show with acrylic and metal canvass with amazing lighting. One can dream, right?
Finally, I love movement in the sky, so I use DaVinci Resolve to create far more than a static shot. In the example below, I started with a timelapse, then dropped in the flattened image from the Photoshop creation, adding a transition from moving imagery to static.
This is a composite using three different programs — Lightroom, Photoshop, and DaVinci Resolve Studio 20. There’s way more that can be done with Resolve, but I’m pretty much a newb the color grading module so I get what I get until I learn more.